Here we have my trials and tribulations with the krios jerk tank, I mean battle tank. Behold its myriad of pieces.
There wasn't much flash to cleanup or problems with removing the gateing. There was two large areas of imperfections in the molding. Nothing catastrophic but annoying, and some consumption of time required. The guns barrel you can see had some over flow, and the tracks were slightly off set down the length of them. The end of the barrel is not that bad as the gun has an additional piece which will cover it up, but I still felt some cleaning would improve it.
Now this wheel looked like it was going to be a problem cleaning. It wasn't the flash easily came off with just picking at it.
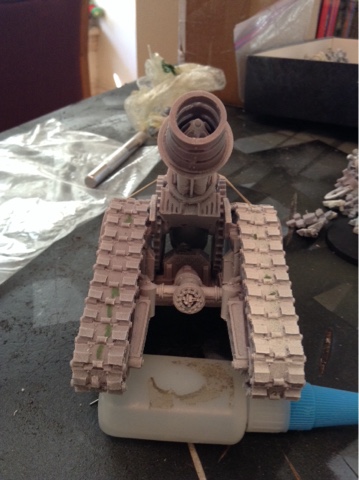
Here we see the tracks and the internal machinery. As well as how the external gear attaches.
The cannon is complete. I had to assemble the operator first then attach the large gears. You can see here the genius engineering I have concocted to help them stay in place while drying.
The internal under body, wish the whole model had been this easy.
Here's where the kit started give me problems. At first I was all like "this so easy, they just slide here." Nope, off in the top you can see the shield which covers the front, and attacts to these rails. Well they may look right, but the right piece was too low. It required a lot of playing around, and cutting during assembly.
Final dry fit with all the pieces.
The gun is made to have a large arc of motion up if desired. I wanted it just shooting good old straight ahead. So I took some spree cut it and placed pieces in the center to keep this position.
Here we see the finished model, and a close up on the driver.
Here we see the basing going on the finished army. The belt feed on this second thanatar was much easier then the first. Defiantly must pin the the two parts together, then when heated will allow easy range of motion and attachment.
Here is the finished army. I will have to show in the future how I got the vorax belt feeds to go on. They started straight and had the end up bent 180'. Now their all ready to be shipped off to be painted.


No comments:
Post a Comment